
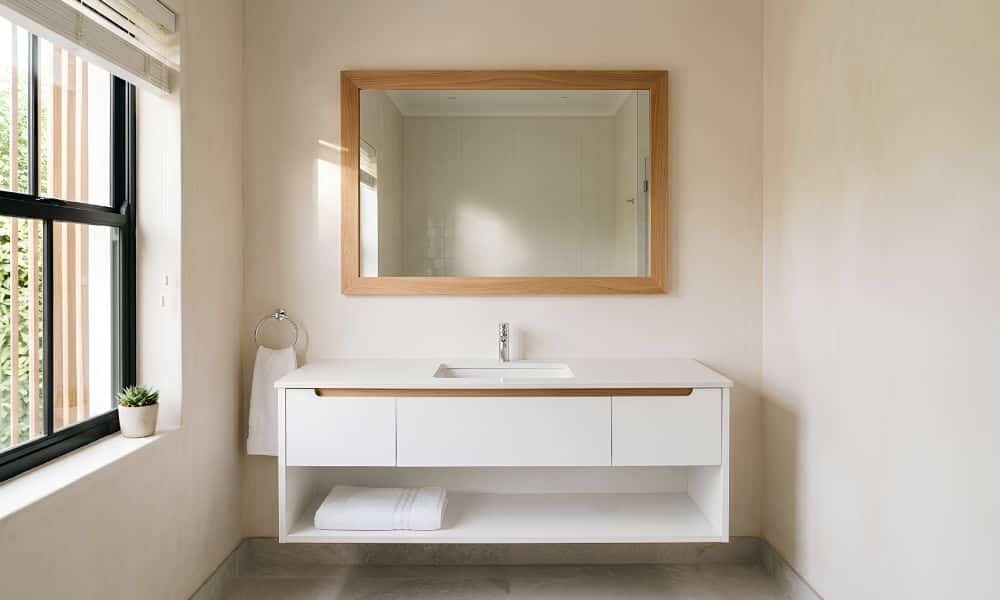
The bathroom mirror is one of the easiest things to change in your home, and one of the most overlooked. Most builder-grade bathrooms come with a plain frameless rectangle glued to the wall functional, but not much else. The good news is there are diy bathroom mirror ideas that work for almost every skill level and budget, from a $25 weekend project to a more involved custom build that looks like it came from a boutique renovation. You don’t need to touch plumbing, pull permits, or hire a contractor. Just a clear plan, the right materials, and a realistic sense of what each approach actually involves. f you haven’t settled on a size or shape yet, it’s worth reading up on choosing the right bathroom mirror before committing to a frame style.
This guide covers six distinct approaches organized from easiest to most advanced, along with what materials hold up in a bathroom, how to hang a heavy mirror safely, and how to match a style to your space before you buy a single piece of wood.
Why the Mirror Is the Right Place to Start
Most bathroom upgrades require touching something you’d rather not tile, plumbing, or electrical. Mirrors don’t. A standard frameless mirror upgrade or a custom frame build changes the visual weight of the room without any of that complexity.
The math is also hard to argue with. A plain frameless mirror from a home center runs $30–$80. A pre-framed mirror in the same size from a furniture or home décor store often runs $150–$400. Building or framing your own puts you closer to that first number while getting you the result of the second. The gap between cost and outcome is what makes this one of the better DIY investments in a bathroom.
Most of the projects in this guide also don’t require a workshop full of tools. A miter saw helps on some of them, but several can be done with a miter box and a handsaw, a tube of construction adhesive, and a few hours on a Saturday.
DIY Bathroom Mirror Ideas Organized by Skill Level
The six approaches below cover most situations: an existing mirror you want to refresh, a blank wall where you’re starting from scratch, and everything in between. Skill levels are honest “beginner” means someone who has used basic hand tools before, not someone who has never picked up a drill.
Beginner: Frame an Existing Mirror
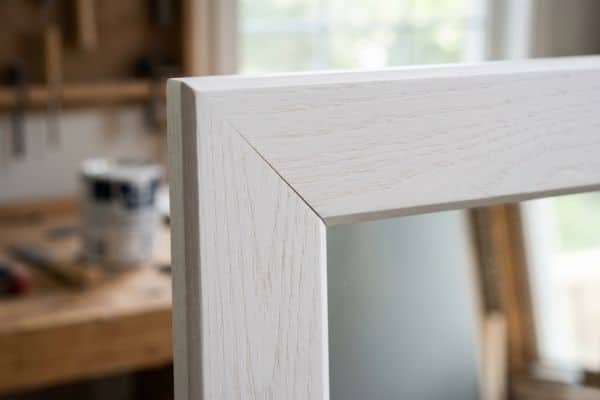
This is the most popular starting point, and for good reason. If your bathroom already has a frameless mirror mounted to the wall, you can build a frame around it without removing it. The frame sits against the wall surface and overlaps the mirror’s edge by about half an inch on each side.
How it works:
You cut four pieces of trim or dimensional lumber to size, miter the corners at 45 degrees, and attach them to the wall (and lightly to the mirror’s edge) using construction adhesive and small brad nails. Then sand, paint or stain, and seal.
Materials:
Pine or poplar trim, 1×3 or 1×4 boards, or decorative molding. Construction adhesive (Loctite PL Premium or similar). Wood filler for nail holes. Paint or stain. A clear polyurethane or polycrylic topcoat rated for bathrooms.
Time: 2–4 hours of active work, plus overnight drying for adhesive and finish coats.
Cost: $20–$80 depending on wood species and mirror size.
Most common mistake:
Skipping the miter cuts and using butt joints instead. Butt joints are faster, but they look noticeably cheaper at the corners. A $15 miter box from any hardware store handles this if you don’t own a miter saw.
A second common mistake is not sealing the wood properly before it goes into a humid bathroom. Bare pine in a steamy bathroom will swell and warp within a year. Two coats of primer and two coats of a water-based polyurethane are the minimum.
Beginner to Intermediate: Mosaic or Tile Frame
If you want texture and a less furniture-like look, applying tile, glass chips, pebble stones, or broken ceramic around a mirror’s edge gives you something that reads more as a decorative element than a standard frame.
How it works:
You build a simple wood substrate around the mirror’s edge (like the framing project above, but with a wider face), then adhere tile or mosaic pieces to that surface using a silicone-based mastic or thin-set mortar. Once cured, you grout the joints and seal everything.
Materials:
Cement board or exterior-grade plywood for the substrate (regular MDF will absorb moisture and fail). Mastic or polymer-modified thin-set. Mosaic tiles, glass chips, or broken tile pieces. Non-sanded grout for joints under 1/8 inch, sanded for wider joints. Grout sealer.
Time: 4–6 hours of active work, plus 24 hours for adhesive cure before grouting, plus another 24–48 hours after grouting before sealing.
Cost: $30–$100 depending on tile type and mirror size.
Critical detail:
Use only waterproof grout and seal it after installation. Standard unsanded grout without sealer in a bathroom will absorb moisture, discolor, and eventually crack. This is the single most common reason these projects fail within the first year.
Intermediate: Build a Framed Mirror from Scratch
If you want a specific size, shape, or wood species that you can’t get by framing an existing mirror, building from scratch gives you full control. The process involves ordering or buying a plain mirror cut to your dimensions, then building a frame around it before mounting.
How it works: Most hardware stores and local glass shops will cut a mirror to size for $20–$60 depending on dimensions. You build a simple rectangular frame from lumber using either mitered or butt-jointed corners, set the mirror into a routed or dado channel cut into the back of the frame (or hold it in place with mirror clips and silicone), then mount the whole assembly to the wall.
Materials: 1×4 or 1×6 lumber in your preferred species. Wood glue and clamps. Brad nails or pocket screws for joinery. Mirror clips or clear silicone adhesive to secure the mirror in the frame. D-ring hangers or a French cleat for mounting. Sandpaper (80, 120, 220 grit). Finish of your choice plus a topcoat.
Time: 4–8 hours of active work across two days (glue-up one day, finishing the next). Add time for any custom routing.
Cost: $50–$150 for materials, plus $20–$60 for mirror cutting.
Tools needed: Miter saw (or miter box with handsaw for straight cuts), drill, clamps, router or table saw if you’re cutting a channel for the mirror. A router is helpful but not strictly required if you use mirror clips instead.
Skill level note: The joinery itself is straightforward for anyone comfortable with basic woodworking. The part that trips people up is getting the mirror seated level and secure without cracking it. Don’t use rigid fasteners directly against the mirror glass silicone gives the slight flex needed to prevent stress cracks as the frame expands and contracts with humidity changes.
Intermediate: Vintage or Thrift Store Mirror Refresh
A well-shaped mirror frame from a thrift store, estate sale, or salvage yard often costs $10–$40 and needs nothing more than a paint job and a fresh seal to look completely different. This approach works especially well if you want an ornate or antique-style frame that would cost $200+ bought new.
What to look for: Solid wood or resin frames in good structural condition. Ignore the finish entirely that’s the part you’re changing. Check the mirror glass itself for silver deterioration (dark spots or cloudiness around the edges, called “desilvering”). A frame with a deteriorated mirror can have the glass replaced at a glass shop for $20–$50 for a standard size, which still keeps the total well under a new purchase.
How it works: Strip or sand the existing finish if it’s flaking or heavily textured. If the existing paint is smooth and well-adhered, scuff it with 150-grit sandpaper and paint directly over it. Two coats of a spray paint rated for the frame material (wood, metal, resin) give a cleaner finish than brush application on ornate frames with carved details. Follow with a clear topcoat.
Time: 2–3 hours of active work, plus 24 hours to cure.
Cost: $10–$40 for the mirror plus $15–$30 in supplies.
Worth knowing: Oil-rubbed bronze and matte black spray paints work well on ornate resin frames and are particularly forgiving the finish naturally emphasizes carved detail rather than hiding it. Gloss paint on a heavily carved frame will show every brush stroke.
Intermediate: Gallery Mirror Wall
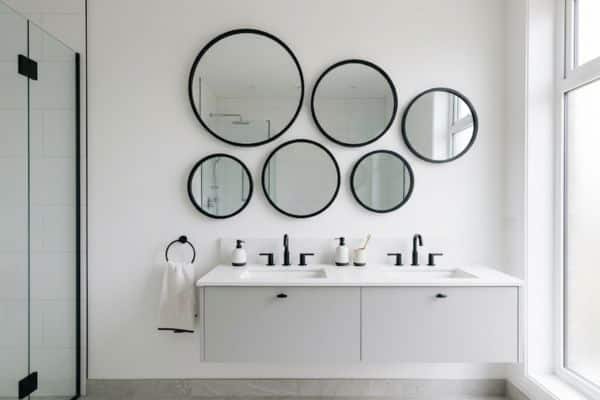
Instead of one large mirror, a cluster of smaller mirrors arranged on the wall reads as a deliberate design choice rather than a default. This works well in bathrooms where a single large mirror would overwhelm a narrow wall, or where you want something that feels less utilitarian.
How it works: You select 4–8 mirrors in complementary shapes or a consistent style (matching round mirrors, mixed vintage frames in the same metal finish, etc.) and arrange them on the wall in a grid or organic cluster. The arrangement centers visually above the vanity, not necessarily above the sink drain.
Layout planning don’t skip this: Lay all the mirrors on the floor in front of the wall first and adjust the arrangement until it looks right. Then trace each mirror’s outline on kraft paper, cut out the shapes, and tape them to the wall to confirm placement before you make a single hole. Measure twice, tape once, then drill.
Mounting: Mirror adhesive strips (Command strips with appropriate weight ratings) work for mirrors under 5 lbs each. Anything heavier needs wall anchors or ideally screws into studs. Add up the total weight of all mirrors and treat the whole arrangement like a single heavy object.
Time: 4–6 hours including layout planning.
Cost: $60–$200 depending on how many mirrors and where you source them. Thrift stores and IKEA are the practical sourcing options at the lower end of that range.
Common mistake: Centering the arrangement on the wall rather than above the vanity. The vanity is the anchor point the mirrors should relate to it, not to the room’s geometry.
Advanced: Arched or Custom-Shaped Mirror Build
An arched mirror or any mirror with a non-rectangular shape creates a focal point that reads immediately differently from a standard frame. The DIY part here is the frame; the actual mirror glass should be ordered from a glass shop, not cut at home.
How it works: You design the arch or curve you want, order the mirror glass cut to that shape (most glass shops handle this; budget $40–$120 depending on size and complexity), and build the frame around it. Frame construction for a simple arch uses either flexible molding bent around a curved form, or a router-cut curved top rail with straight side rails.
Flexible molding approach: Thin kerf-cut molding (strips with cuts partway through the back, allowing them to bend) can be soaked in water for 30–60 minutes and bent around a plywood form, then clamped until dry. This is accessible for an intermediate woodworker with patience. The result looks like a continuous curved profile rather than a segmented curve.
Router-cut approach: Cut the arch shape from a wider board using a jigsaw or router template, then join it to the side rails. Cleaner result but requires more precision.
Time: 6–12 hours across multiple sessions.
Cost: $100–$300+ depending on mirror size, glass complexity, and wood species.
Honest assessment: This project has more failure points than the others. The glass order needs to be right before you build the frame, and building a frame around an irregular shape requires more careful measuring than a rectangle. If you’ve built furniture before, this is a natural next step. If your last project was painting a wall, start with one of the beginner options first.
Materials That Hold Up in a Bathroom
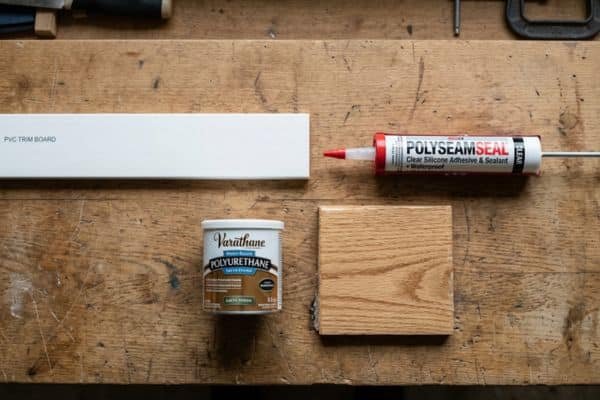
The biggest reason DIY mirror projects fail isn’t the build it’s using materials that weren’t designed for a humid environment. A bathroom with a shower or tub generates repeated cycles of steam and condensation. Wood swells. Adhesives lose grip. Finishes peel. Choosing the right materials from the start is what separates a project that looks good in five years from one that looks rough in five months.
Wood choices:
| Material | Humidity Performance | Cost | Best For |
| Pine | Moderate — seals well, but needs two coats of primer minimum | Low | Painted frames |
| Poplar | Good — stable, takes paint cleanly | Low–moderate | Painted frames |
| Oak | Good — dense grain resists moisture absorption | Moderate | Stained or natural finish |
| MDF | Poor if unsealed — swells at edges on contact with moisture | Low | Painted only, fully sealed including all cut edges |
| PVC trim | Excellent — doesn’t absorb moisture at all | Moderate | High-humidity bathrooms, especially near the shower |
| Teak | Excellent — naturally high oil content | High | Natural or oiled finish in wet areas |
PVC trim (often sold as cellular PVC or foamed PVC board) deserves more attention than it usually gets in DIY mirror guides. It machines like wood, takes paint well, and doesn’t care about humidity. If your bathroom runs hot and steamy, it’s worth the modest extra cost over pine.
Adhesives:
Construction adhesive like Loctite PL Premium or Liquid Nails Heavy Duty is appropriate for attaching a frame to a wall. For securing mirror glass inside a frame, use clear silicone, not construction adhesive, which is too rigid and can stress-crack glass as the frame moves slightly. For mosaic or tile work, use a polymer-modified thin-set or a silicone-based mastic rated for wet areas.
Finishes:
Water-based polyurethane (such as Minwax Polycrylic or a comparable product) in a satin or semi-gloss sheen is the practical choice for bathroom woodwork. It dries clear, cleans up with water, and holds up to humidity better than oil-based finishes in this application. Apply at least two coats, sanding lightly with 220-grit between coats. Pay attention to end grain and cut edges those absorb more moisture than face grain and need an extra coat.
One thing worth stating plainly: no wood finish makes a material fully waterproof. It slows moisture absorption. In a bathroom directly adjacent to a shower, even well-finished wood will eventually show wear. PVC trim or tile is the right call for anything within splash range.
Hanging a Heavy Mirror Safely
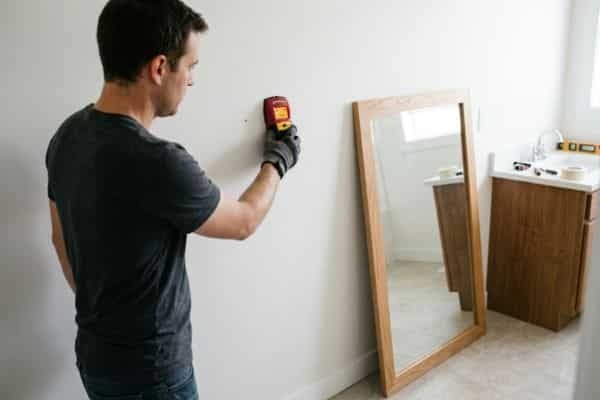
Most mirror projects fail structurally for one of two reasons: the wrong anchors for the wall type, or anchors in the wrong locations. Neither is complicated to get right, but skipping this step is how a mirror ends up on the floor at 2 a.m.
Finding studs in a bathroom: Standard stud finders work fine on drywall. Tile is a different situation tile walls make electronic stud finders unreliable because the density of the tile interferes with the reading. In a tiled bathroom, try a rare earth magnet to locate drywall screws behind the tile (they’ll hold the magnet through most tile thicknesses), which tell you where studs are. Alternatively, measure from a corner studs are typically 16 inches on center, so if you find one, you can predict the next.
Weight guidelines:
| Mounting Method | Practical Weight Limit | Notes |
| Adhesive strips (e.g., Command) | Up to 16 lbs | Follow weight rating exactly; humidity reduces adhesion over time |
| Standard plastic expansion anchors | 20–25 lbs | Not reliable in high-humidity environments; use only as a last resort |
| Toggle bolts (snap or wing type) | 30–50 lbs depending on size | Reliable in drywall between studs; check product rating |
| Screws into studs | 50+ lbs | Always the strongest option; preferred for anything substantial |
| French cleat | 50–100+ lbs | Excellent for large or heavy mirrors; distributes load across multiple studs |
A French cleat is worth understanding for any mirror over about 30 lbs. It’s two interlocking beveled strips one screwed to the wall into studs, one attached to the back of the mirror that hook together. The mirror hangs securely, can be removed easily, and the weight is distributed across the full width of the cleat rather than concentrated at two hanger points.
Drilling into tile: If your mirror needs to mount on a tiled wall, use a carbide-tipped or diamond-tipped drill bit, not a standard twist bit. Start at very low speed with no hammer setting to avoid cracking the tile. Mark your drill point with tape to prevent the bit from skating across the surface before it bites. Drill slowly, keep the bit cool with water if it’s getting hot, and stop before you feel the bit break through into the drywall behind the tile itself shouldn’t be load-bearing, so your anchor needs to seat in the drywall or stud behind it.
When to call a professional: Mirrors over 50 lbs mounted at head height, any situation where you can’t confirm stud location with confidence, and any mirror mounting that involves cutting or removing existing tile to access the wall structure behind it.
Style Directions Worth Considering Before You Start
The most technically sound mirror project can still look wrong if the frame style fights the room. A few specific pairings worth thinking about:
Farmhouse or rustic bathroom: Reclaimed wood with visible grain, knots, and a slightly rough texture reads naturally here. A dark walnut stain or a weathered gray finish works better than a smooth painted frame. Avoid overly uniform lumber the character is the point.
Modern or minimalist bathroom: Thin frames in matte black metal or a very narrow wood profile in a dark stain. Or no frame at all, with an LED strip mounted behind the mirror’s edge to create a backlit effect. For more on pairing light sources with your mirror placement, see bathroom lighting ideas over a mirror. The proportions matter more here than the material a wide, chunky frame in a spare modern bathroom will look like a mistake.
Traditional bathroom: Ornate molding profiles with a painted finish (bright white or a soft off-white like Benjamin Moore White Dove) or a metallic finish in brushed gold or antique silver. This is where the thrift store refresh approach pays off most ornate carved frames are available cheaply secondhand and look at home in traditional spaces.
Coastal or beachhouse bathroom: Driftwood-gray paint, rope detail, whitewashed pine, or a pebble tile mosaic frame. The palette tends toward whites, sandy tones, and natural textures. Avoid anything that reads as formal or heavy.
The useful question to ask before you commit to a material or finish is: what else in this bathroom already has a strong presence? If the vanity has a dark stain and black hardware, a light-colored frame will look intentional. If you’re putting a dark frame next to dark hardware and dark countertops, you lose the mirror in the wall. Contrast tends to work better than matching everything.
Costs to Expect for Each Approach
| Approach | Skill Level | Materials Cost | Active Time |
| Frame an existing mirror | Beginner | $20–$80 | 2–4 hours |
| Mosaic or tile frame | Beginner–Intermediate | $30–$100 | 4–6 hours + cure |
| Build from scratch | Intermediate | $70–$210 | 4–8 hours |
| Thrift store refresh | Intermediate | $25–$70 | 2–3 hours |
| Gallery mirror wall | Intermediate | $60–$200 | 4–6 hours |
| Arched or custom build | Advanced | $100–$300+ | 6–12 hours |
A few honest notes on these ranges: lumber prices vary significantly by region and have been volatile in recent years. Get a current quote at your local home center before budgeting. The “build from scratch” row includes mirror glass cutting costs. The gallery wall range assumes you’re sourcing at least some mirrors secondhand; buying all new adds up faster than most people expect.
Labor cost, if you end up hiring any part out (glass cutting is worth paying for, drilling into tile if you’re not comfortable with it), typically runs $50–$150 for a single visit from a handyperson in most markets.
Before You Start: What to Check First
A few things worth confirming before you buy materials or pick up a saw:
- Measure the existing mirror precisely, including thickness this affects how your frame overlaps the edge.
- Check how the current mirror is mounted. Once your new frame is up, knowing how to clean a bathroom mirror without damaging the finish or the glass will keep it looking good long-term. Frameless mirrors are often glued directly to drywall with mirror mastic. Removing one without cracking it or pulling drywall paper takes patience and a thin tool (a guitar string or piano wire works well, worked behind the mirror from one corner). Know what you’re dealing with before you commit to a project that requires removal.
- Locate studs or blocking behind your intended mounting area before settling on a frame size or hanging method.
- Check lighting. A larger mirror will reflect more of the room, including light fixtures. If your bathroom has a single overhead light, a bigger mirror can actually make the lighting feel harsher. Conversely, if you have sconces flanking the vanity, a wider mirror will interact well with them.
- Confirm electrical clearance. If there’s a medicine cabinet or electrical outlet adjacent to your mirror, keep the frame profile narrow enough not to overlap.
- Account for cure and dry time in your schedule. Several of these projects involve 24–48 hours of waiting between steps. A project that needs two weekends is fine just don’t start it the Thursday before guests arrive.
FAQ
Yes, and that’s actually the easier approach for most frameless bathroom mirrors. The frame attaches to the wall surface and overlaps the mirror’s edge by about half an inch. You don’t need to remove the mirror at all unless it’s damaged or you want a different size.
Work a thin, flexible tool, a long section of piano wire, or a specialized mirror removal tool behind one corner of the mirror and slowly work it back and forth across the width. Heat from a hair dryer applied to the front of the mirror softens the mastic slightly and makes this easier. Have a second person hold the mirror as you work a falling mirror is dangerous. Expect some drywall paper to come with it; that’s patchable.
A mirror under 20 lbs hung on two toggle bolts in drywall is generally fine. For anything 30 lbs or above, find the studs and screw directly into them, or use a French cleat that spans multiple studs. If you’re unsure of your wall’s construction, particularly in older homes with plaster walls rather than drywall, consult a handyperson before hanging anything substantial.
The finish needs to be moisture-resistant, not waterproof. A water-based polyurethane in satin or semi-gloss is the standard choice. Apply at least two coats, with a light sanding between coats. If the frame is near a shower or sees direct water contact regularly, add a third coat and pay extra attention to sealing all cut edges and end grain.
For lighter mirrors under 15 lbs, Command strips rated for the weight can work. The honest limitation is that bathroom humidity reduces adhesive performance over time, particularly if the strips are near a shower. For anything over 15 lbs, or any mirror you’d rather not find on the floor in a year, use wall anchors or screws into studs instead.
The Right DIY Bathroom Mirror Idea Comes Down to Your Starting Point
If you already have a frameless mirror on the wall and just want it to look less bare, framing it is the fastest, cheapest, and most reversible upgrade on this list. You’re starting with a blank wall or replacing something you’re removing anyway, building from scratch gives you the most control over the result. If you want maximum visual impact with moderate effort, a gallery wall of smaller mirrors punches above its weight.
Whichever of these diy bathroom mirror ideas you take on, the materials and mounting decisions matter as much as the aesthetic ones. A beautiful frame that warps in six months, or a heavy mirror hung on the wrong anchors, undoes the whole project. Get those two things right moisture-appropriate materials, properly anchored to the wall and the rest is mostly a matter of taste and a free Saturday.


